temp

temp
I shot these with camera settings of F11 aperture, 1/10 shutter speed, and 400 ISO. For future reference, this came out way too overexposed (only one had the sky crisp) and was the darkest version I took. But according to this badass I need to keep the ISO low to prevent too much grain. And yet, upon saving, closing, and reopening some of these, they look far darker. Here’s their various HDR settings in Photoshop:
01–straight import @32 bits. I didn’t adjust it heavily on import, for fear I’d damage the lighting data.
02–Used the image adjustment HDR toning, set to more saturated. It’s interesting to see what adjustment options are left for 32 bit images, and I’m curious which are good, which are bad. Case in point, Desaturate probably just throws out lots of good juicy pixel info.
03–HDR toning, default settings.
04–Exposure
05–Levels
There’s also a square and equirectangular version, distorted using Flaming Pear‘s Ornament filter and Flexify2 filter.
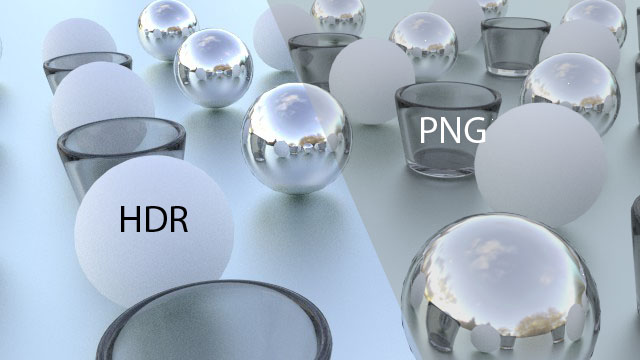
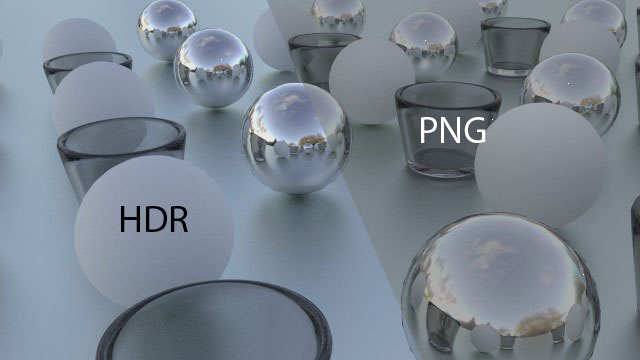
Some quick render results in Cycles, with glass, diffuse and glossy materials at work. I tried this same scene with a version of baechler_park_mirror01 saved as a 16 bit PNG, and you can really tell why HDR matters. The png, even if you get it looking nice, has zero feedback when adjusting the world strength or render exposure, and when the world’s hooked up to node goodies like a brightness/contrast or gamma node, the 32 bit HDR tap dances all over the PNG.
With no environment noding/exposure:
With low exposure (.5)
And noding the environment to have a gamma of 2.
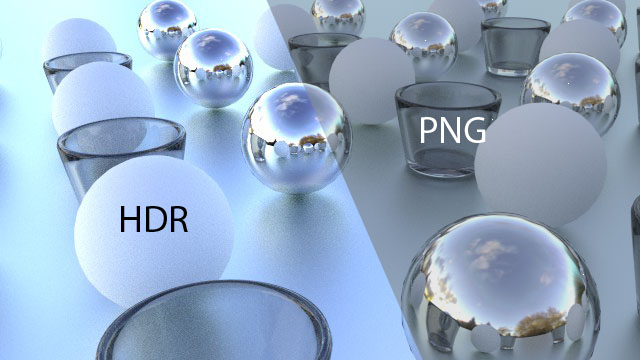
Pretty devastating. Under low exposure, the HDR still keeps the whites white before adjustments. And on the gamma mod, the PNG environment map practically stays the same. Vibrance is lost across the board on these.
All the HDR maps in the .zip file are released under a CC-Zero license. I made these using a homebrew light probe, but that’s another post entirely.
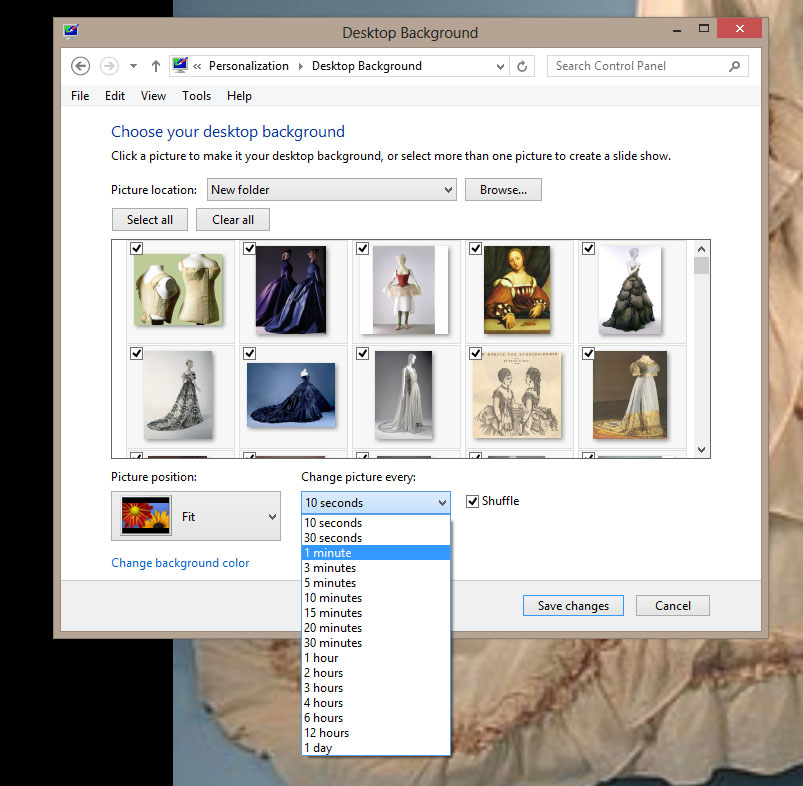
Let’s face it, whippersnappers love their computers, and with my lovely newborn baby Susan it’s harder to get out the door for life drawing. There’s a couple websites out there that have cycling timed picture functions, but their success is mixed; the pictures aren’t full screen, and you’re limited to their selection, which might not have been updated since the site’s inception.
But never fear! You actually have a fantastic piece of software to solve this, and you see it multiple times per day. Your desktop! Get the full screen goodness, with an easy interface for “poses” that last 30 seconds to 20 minutes. Depending on your OS, you can even right-click on the desktop and choose the next image if you get one you don’t like.
But where to get pictures? The best option is without a doubt Tumblr. Any given subject will have some tumblr out there amassing a giant library of pictures on the subject. Here’s a few good ones:
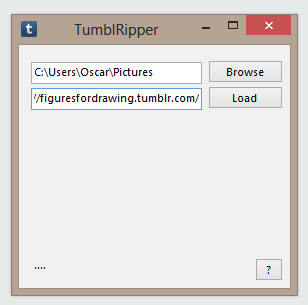
Use your own Google Fu to find all sorts of good tumblrs of varying SFW and NSFW varieties. I find Tumblr to lean a bit porny, not to mention mainstream in model types, so consider searching for things like elderly nudes, hourglass, etc. But you don’t want to right-click-save-as on all these, amirite? So check out Tumblripper to do the work for you. Just enter a URL and a folder destination, and it will grab all the images on the whole tumblr for your use as a life drawing archive.
And of course, don’t forget the last step. Go draw something!
My friends in the band Swingset Showdown recently funded their debut album “Short Bus Ruckus” with Kickstarter, and hooked up with me to do the album art. These are the cats who made my theme song, so how could I refuse?

Swingset Showdown’s stuff is boisterous, tongue-in-cheek music that has more intricacy than it should, considering its juvenile nature. I wanted to capture that, so a major inspiration came from Jack Davis. His album covers had an overstimulating, to0-much-going-on quality to them that made their entertainment value last beyond the first glance.


Another concept I love for this sorta thing is doing flat compositions, where you’re almost looking at the scene like it’s a trompe l’oeil. Rockwell did this a bunch. The nice thing is that, since you commit to a flat perspective, you can focus on the silhouette and flow of a picture rather than whether your perspective math is correct.

After several such roadside scenes were used to make the album art, I turned them into a long landscape, and used that to make a polar panorama.

And then when you pull the CD back… (Explosion made in Blender, because I have no soul.)

I had a lot of fun working with them, and the album turned out great. Come see them get down at their CD release party on Saturday, Dec. 15th at the High Dive!
P.S. No Seabug in January, as I’ll be on baby hiatus.
P.P.S Jack Davis & Norman Rockwell copyright blah blah blah.
Guess what came in the mail the other day! An advanced copy of Mastering Blender 2nd Edition, by Tony Mullen. I was tech editor for this book, which involved a hefty update to Blender 2.6x’s updated interface, shortcuts and features.
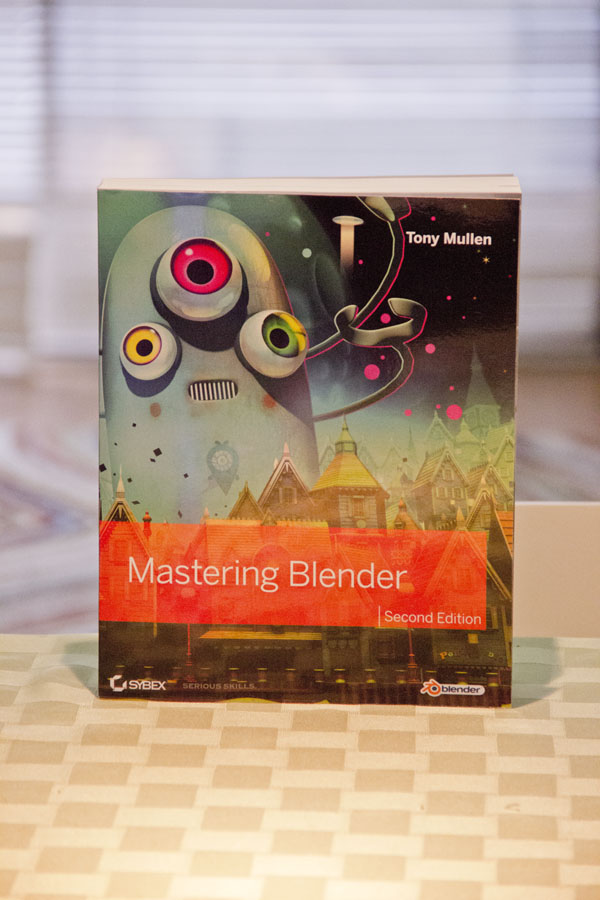
Mastering Blender is a great kitchen sink book on Blender, covering everything beyond the beginning interface and controls. Modeling, particles, game engine, python, rendering, compositing, you name it. It’s a wonderful stocking stuffer for the blender nut in your life. Buy it from Amazon! And while you’re at it, check out Tony Mullen’s production blog for his short film Electric Town.
Chances are, at some point you’ll be faced with the task of taking photos for an environment map. Doing it yourself means creating an EXR or HDR file, which has high dynamic range, and thus the lighting will accurately affect your scene.
Then you get lazy and just grab crappy .JPEG panoramas off the internet XD
In Cycles, you can fake such a photo into having more lighting information than it actually does by combining it with a Sky texture. Here’s the node setup. Sky textures assume a whole world’s lighting, so I use gamma to clamp out the higher levels, then make it a little more yellow with a mix node. On its own, the JPEG sky can’t go up or down in exposure like an HDR file; it’ll just blast it out with pixels or dull the lights. Lastly, the mapping node in the start lets you “spin” the world with the Z rotation.

A big problem with 3D is that, when making a composition, you can change the size and shape of things infinitely. Something too small? Scale it! Found a nice angle while zooming with your camera? Change the view! To contrast this, when you’re drawing or painting you eventually commit to your easel’s placement, and you can’t magically make your bowl of fruit bigger or smaller.
Additionally, you almost certainly worked on a tiny detail, and thus it breaks your heart to see it cut out of frame. Ego makes you want to emphasize each detail. Everything gets emphasized, therefore nothing gets emphasized, and your composition suffers.
Blender’s grease pencil can give you a handy fix for that. Observe this WIP scene. I knew I wanted a close-up still life, but started by modeling all the individual components.
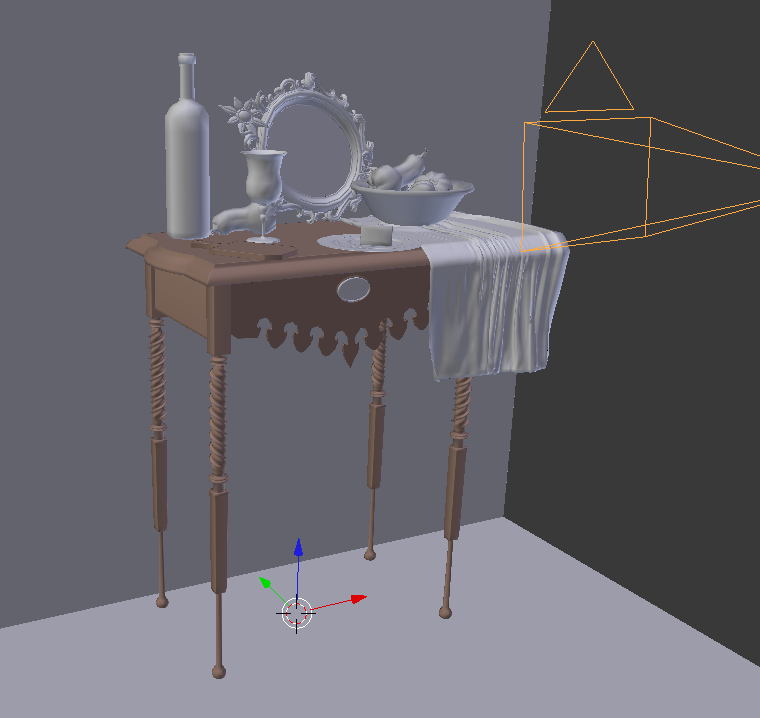
Hey, look! My table has cool legs and filigree! The urge is to suddenly break my original goals, to jam that extra detail into the shot.
Eschewing the unnecessary, I compose the camera for a much tighter angle. I’m combining several composition ideas here: Thirds (set in the camera settings under composition guides), steelyard, negative space between the wine bottle and goblet, blah blah blah. But I’m also attached to minor modeling details I’d concocted!

Grease pencil can let you study your composition objectively. If you’re new to grease pencil in blender, its lets you draw on top of your screen, and is handy for note taking, live demos, and even asset creation by converting strokes to curves.
D + Left Mouse Button: Draw strokes
D + Right Mouse Button: Erase Strokes
Ctrl D + Left Mouse Button: Draw straight lines
D + Right Mouse Button: Enters a grease pencil session, where Left Mouse Button adds a new point and Right Mouse Button exits this mode.
You can edit grease pencil settings in the 3D view’s properties panel, toggled with N.
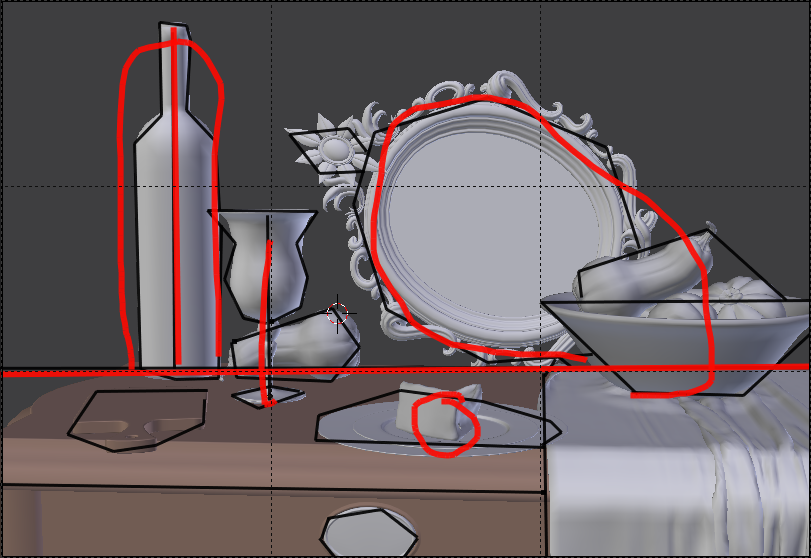
I drew two grease pencil layers: the thicker red layer to highlight the primary sense of balance, where main objects balance on a fulcrum, and the thinner black layer to mark meaningful shapes.
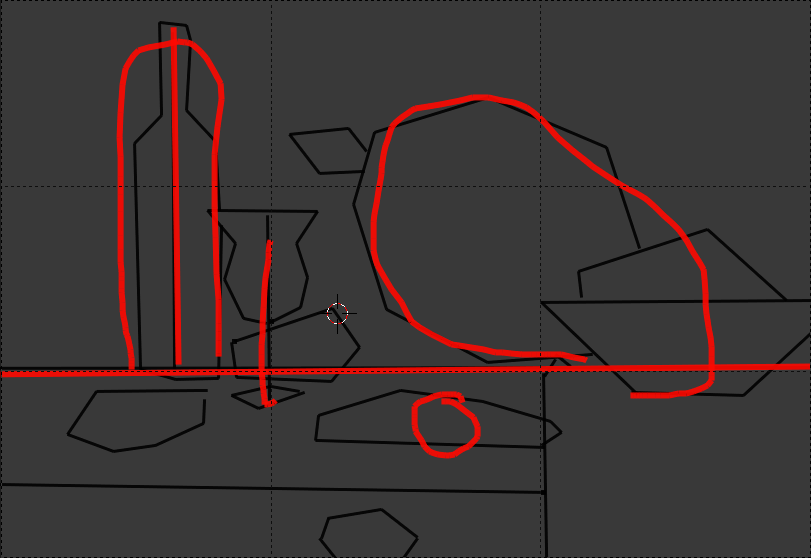
If we now view this from far away, this abstract art still life provides a ton of compositional reassurance without the noise of 3D purties. Several ideas can now be gleaned from this:
Fun fact about traditional still life paintings: artists would often include things such as knives or plates hanging over the edge, to draw you in with a false sense of urgency that they were about to fall off the table XD
I recently animated a music video for the band the True Spokes (formerly known as Flowmotion), along with my brother Trav. We didn’t have much time or budget, but we nonetheless cranked out a nice lil 3D vista. I used a delightfully fast halftone shader for much of the renders, based on a shader whipped up by the insanely talented Vertenflow, who comes to Seabug regularly.
Check out more of the True Spokes’ tasty tunes on their homepage!
Got the render down to 19 seconds. 
Just the facts.
